1. Receipt Printer
Here you choose how your receipts are printed – and whether they’re printed automatically after each sale.
How to set up your receipt printer:
-
Go to Settings –> Hardware –> Printers and click “Add Printer"

-
Choose the printer you want to use (USB, Bluetooth, network printer or device printer)
-4.png?width=688&height=513&name=image%20(1)-4.png)
-
Give the printer a recognizable name (e.g. “Register 1 - Front Counter”)
-
Choose how many receipts should be printed per sale
-
Enable automatic printing if you want receipts printed after every sale
-
Want to share the printer with other registers in the same store? Turn on “Share printer”
-Jun-16-2025-09-29-27-9004-AM.png?width=688&height=505&name=image%20(2)-Jun-16-2025-09-29-27-9004-AM.png)
🔔 Note: You can only add one receipt printer per register
2. Printer Groups
Printer groups are typically used for kitchen or production printing, where specific items are sent directly to e.g. the kitchen. You decide what is printed where
Example: A burger and a soda are ordered. The burger is sent to the kitchen printer – the soda is not printed, since it’s taken directly from the fridge.
How to create a printer group:
-
Go to Settings –> Hardware –> Printers and click “Create new printer group”

-
Name your printer group (e.g. “Kitchen Printer”)
-
Choose how many copies should be printed per order
-
Enable if printouts should be split by dish (e.g. starter, main, dessert)
-1.png?width=688&height=514&name=image%20(4)-1.png)
-
Select what triggers the group to print – based on categories or tags
-
Categories (e.g. “Food”)
-
Tags (e.g. “Kitchen”, “Bar” or even “Product Type”)
-
.png?width=688&height=517&name=image%20(5).png)
-2.png?width=688&height=516&name=image%20(6)-2.png)
3. Production Printers
These printers are part of a printer group – and often used in kitchens, bars, or production areas.
How to add a production printer:
- Go to Settings –> Hardware –> Printers and click “Add Printer" under the selected printer group.
.png?width=688&height=516&name=Kopi%20af%20Printer%20settings%2c%20POS%2c%20New%20printer%20group%20(2).png)
-
Give the printer a name (e.g. “Kitchen Printer 1”)
-
Choose how many copies should be printed per order
-
Enable if the printer should be available to other registers in the same store
-
Want to use a buzzer that alerts when a new order is printed? Enable it here.
-1.png?width=688&height=519&name=image%20(8)-1.png)
🔔 You can add multiple printers to the same printer group if needed.
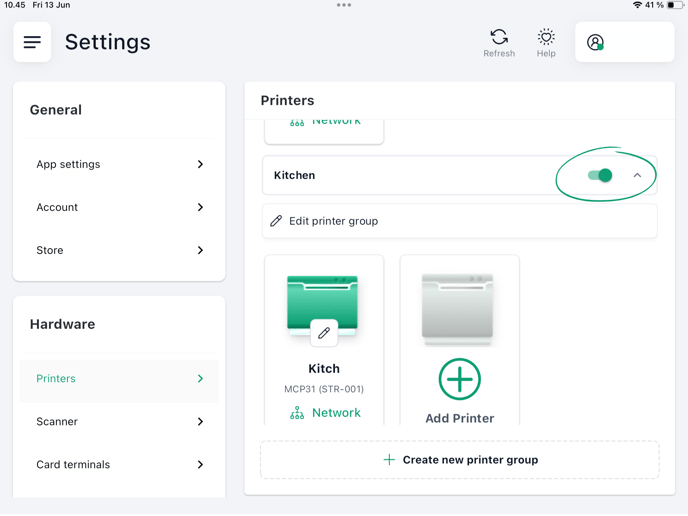
4. Disable a printer group on a specific register
By default, printer groups are available to all registers – but you can easily turn them off for specific ones.
How to do it:
-
Go to the register settings
-
Disable the printer group under printer settings