Shopbox offers many smart features to support your business. Log in at my.shopbox.com using your email and password (the same as in the app) and make use of features such as Variants, Modifiers, and Menus.
Variants
A variant is an option you can add to a product. This can be useful, for example, if you are selling trousers and want them sold by size. In Shopbox, you can link different variants (sizes) to a single product (the trouser model).
First, create the variant:
- Go to the “Variants” tab and click the '+' icon in the upper right corner
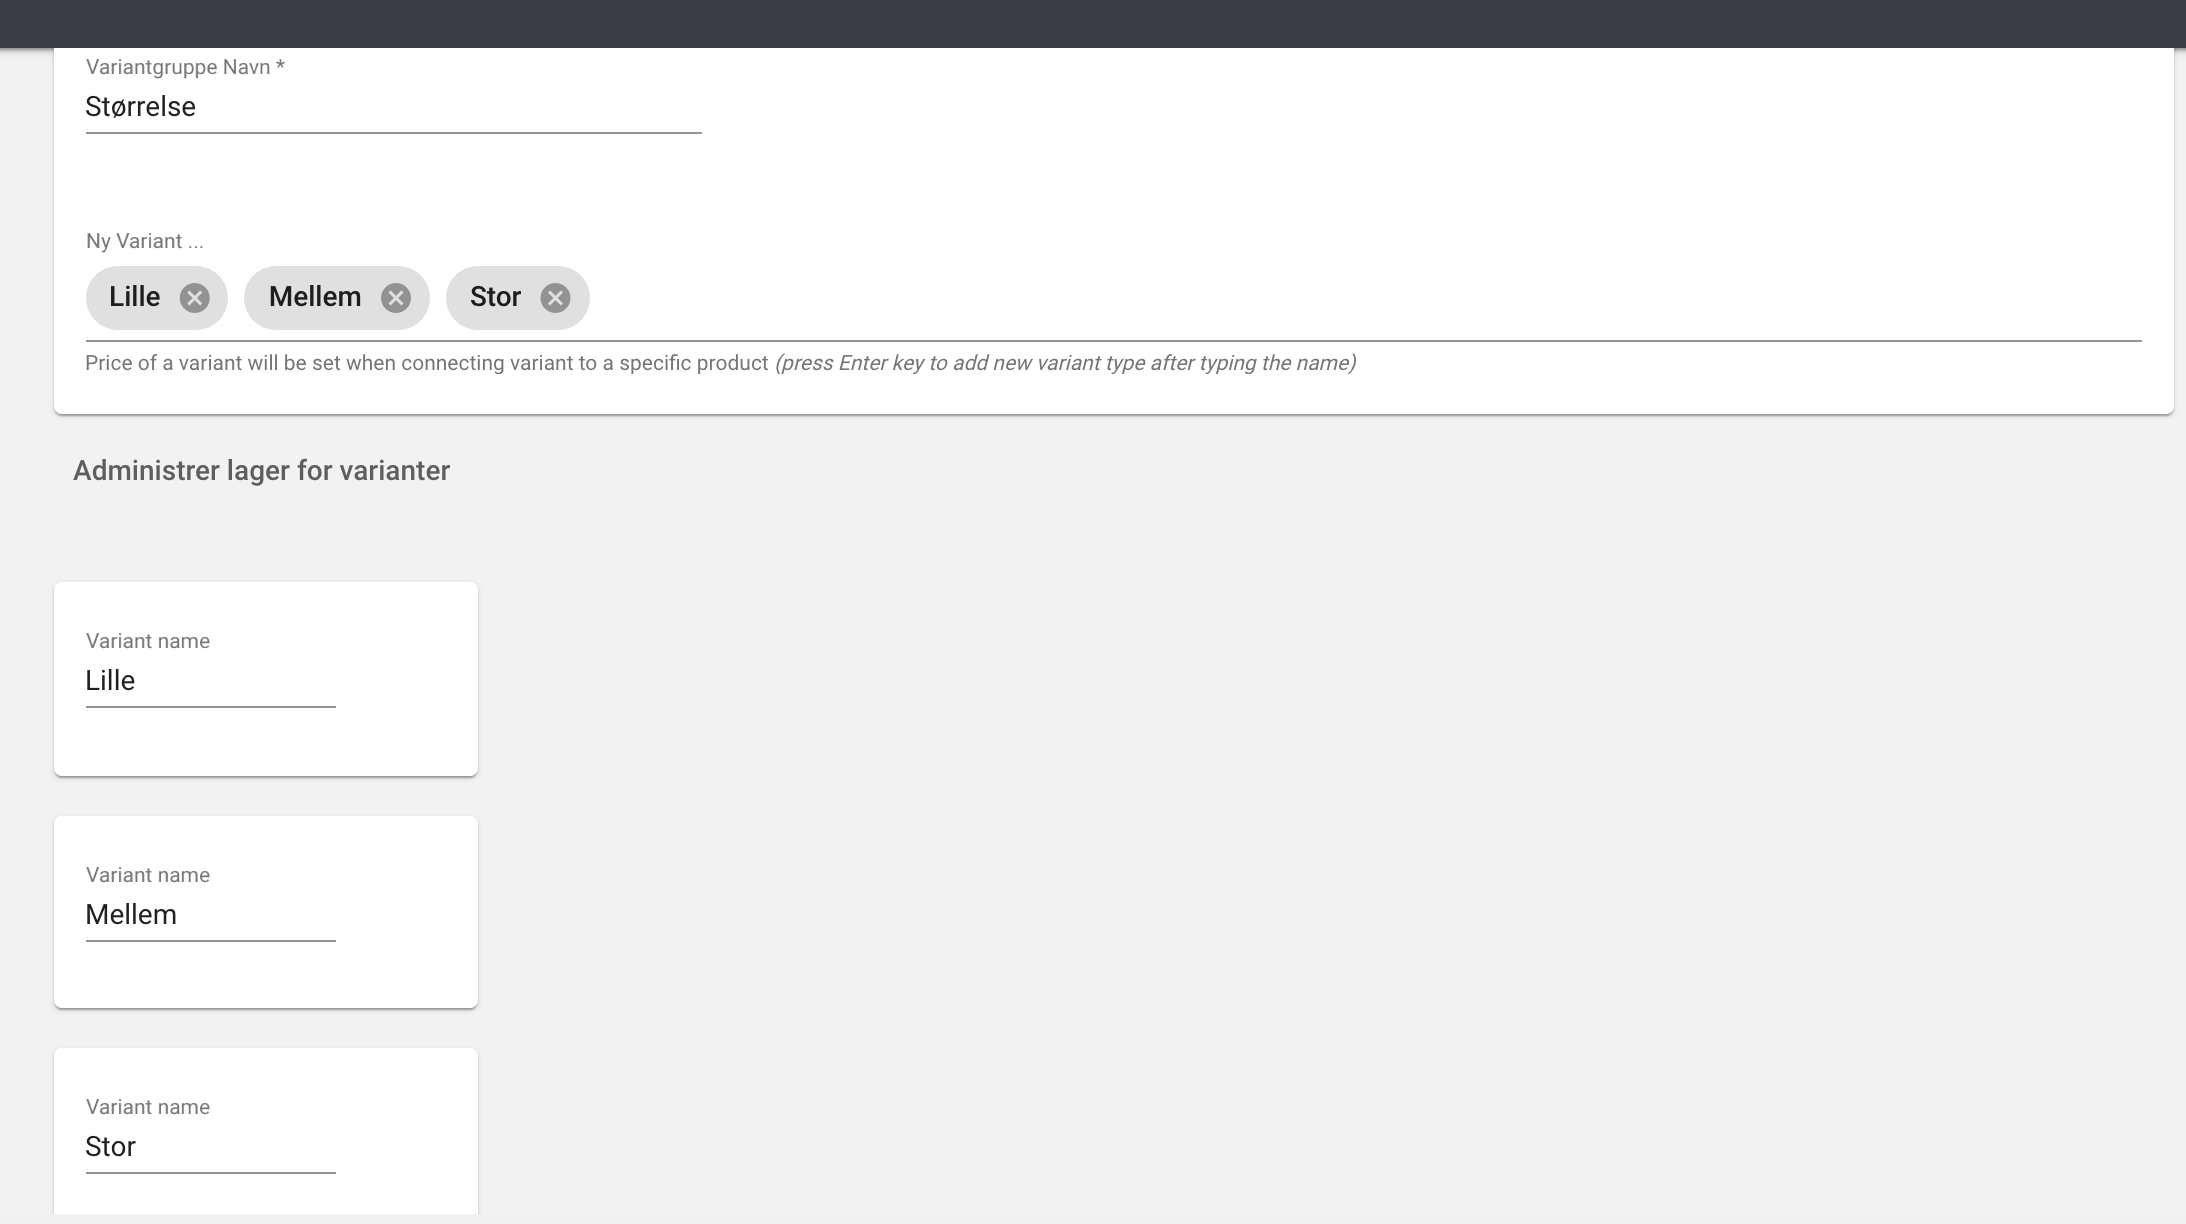
- Create the variant: enter the Variant Group Name, for example “Sizes”
- In ‘New Variant’, type options such as “Small”, “Medium”, “Large” etc. Press "Enter" between each variant
- Click ‘Save’ to save the group
Now link the variant to a product:
- Go to the “Products” tab
- Find the product you want to add the variants to and click the pen icon
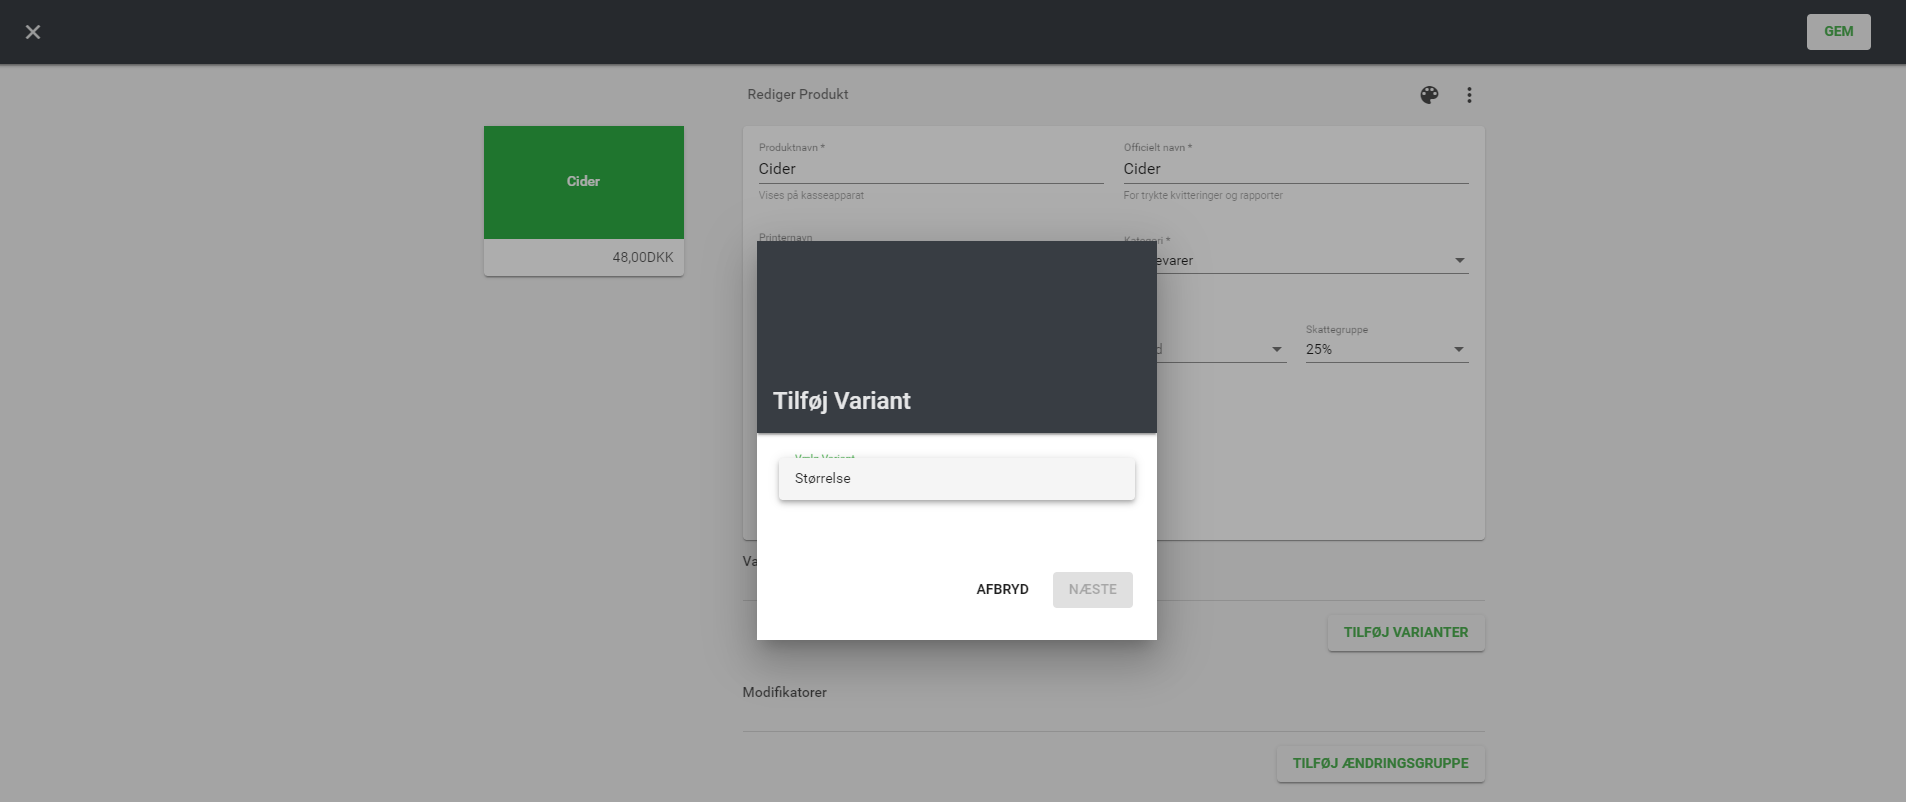
- Click ‘Add variant’. The variant groups you have created will now appear. Choose e.g. “Sizes” and click Next.
- Now assign a price to each variant. This is the total price for the product, including the variant-specific price
- Click Save to finish
Modifiers
Modifiers are additional products that can be added to other products. For example, if you run an ice cream shop and want to sell toppings, you can use modifiers to let customers choose options like “Extra sprinkles” or “Chocolate flake”.
To create a modifier:
- Go to the “Modifiers” tab
- Click the '+' icon in the top right corner
- Fill in the fields:
- Modifier Group Name
- Modifier Name
- Official Name (if left empty, it will default to the Modifier Name)
- Printer Name: If the modifier should appear differently on the kitchen print
- Category: Which category the modifier belongs to
- Price: The modifier’s price
- Purchase Price
- Tax Group: 25% VAT (default is 25%)
- SKU Code – internal product code for stock tracking
- Barcode
- Click Save to finish
To add a modifier to a product:
- Go to the “Products” tab and find the product you want to modify
- Click the pen icon for that product
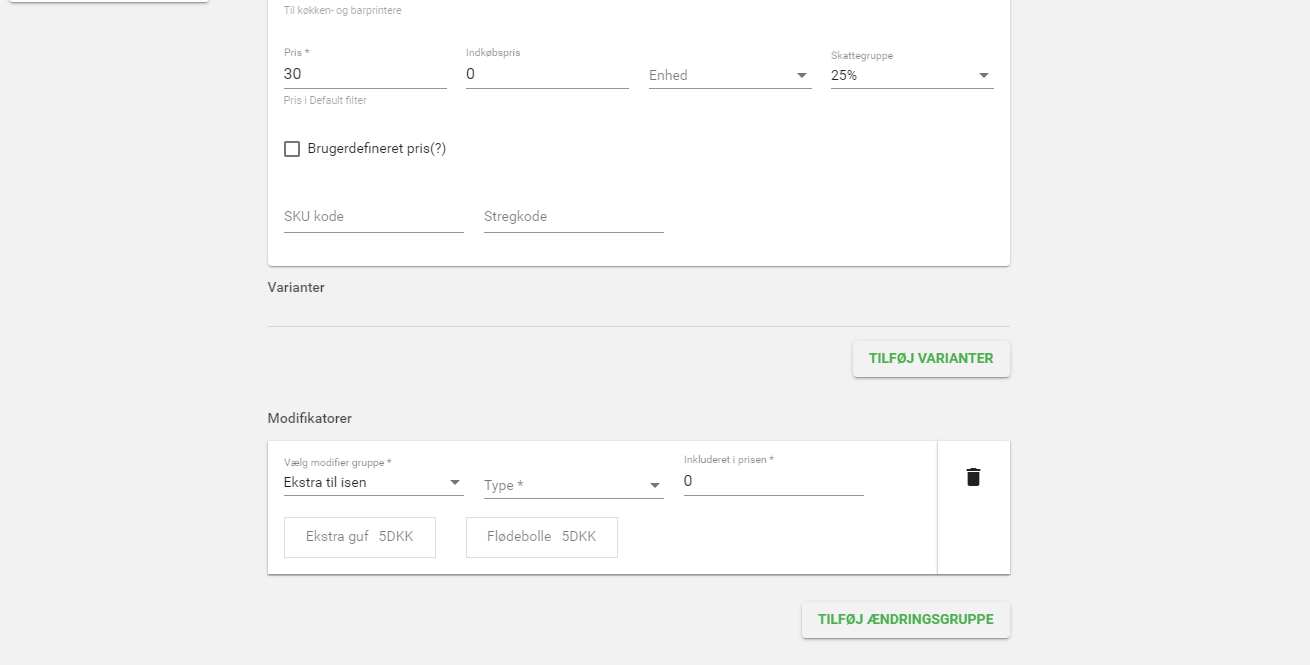
- Click ‘Add modification group’ and choose the group you just created (e.g. "Ice cream toppings")
- There are two types of modifiers:
- Mandatory – If at least one modifier must be selected for the product
- Multiple – Allows you to select more than one modifier for the product
- You can also specify whether the modifier is included in the price, and how many are included
- Click Save to finish
Menus
Menus are used when you want to create special offers for multiple products.
For example, if you sell 1 soda for 15 DKK but 3 for 35 DKK, you can use the menu feature to set up this kind of offer.
- Go to the “Menus” tab
- Click the '+' icon in the upper right corner and fill in the following:
- Menu Name
- Official Name: The official name of the menu (if left blank, the menu name will be used)
- Printer Name: If your menu should have a specific name on kitchen prints
- Category: Which category the menu belongs to
- Price: The menu’s total price
- Now add the products that should be included in the menu by clicking ‘Add Menu Product’.
- Fill in the following:
- Product Quantity
- % of Price – Allocate the total price using percentages. For example, if the menu costs 100 DKK and includes 4 items, you can assign 25% to each (total must equal 100%)
- Search Products – Search for the products you want to include from your catalogue
- Click Save to finish
If you have any questions, feel free to contact us via the chat icon in the bottom right corner or call us at +45 31 13 15 15.